
I’ll explain how I build a sliding table and how I took the following shot:
What is a sliding table?
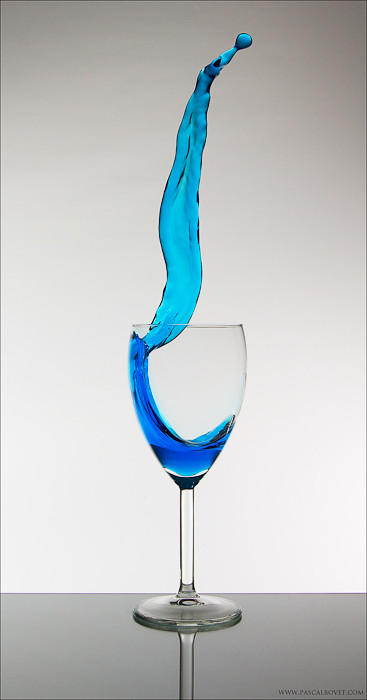
The idea was to take an image of a splash in a glass. Therefore the glass must be accelerated and stopped abrupt. This sudden stop creates a splash. One could move a glass on a board and accelerate it by hand, but as I wanted a constant setup, I build a sliding table, which does exactly what described above.
The table has a defined way, on which the board can slide. This is delimited by the two scantlings on the left and right side. At the end of the slider way there is another scantling to stop the slider.
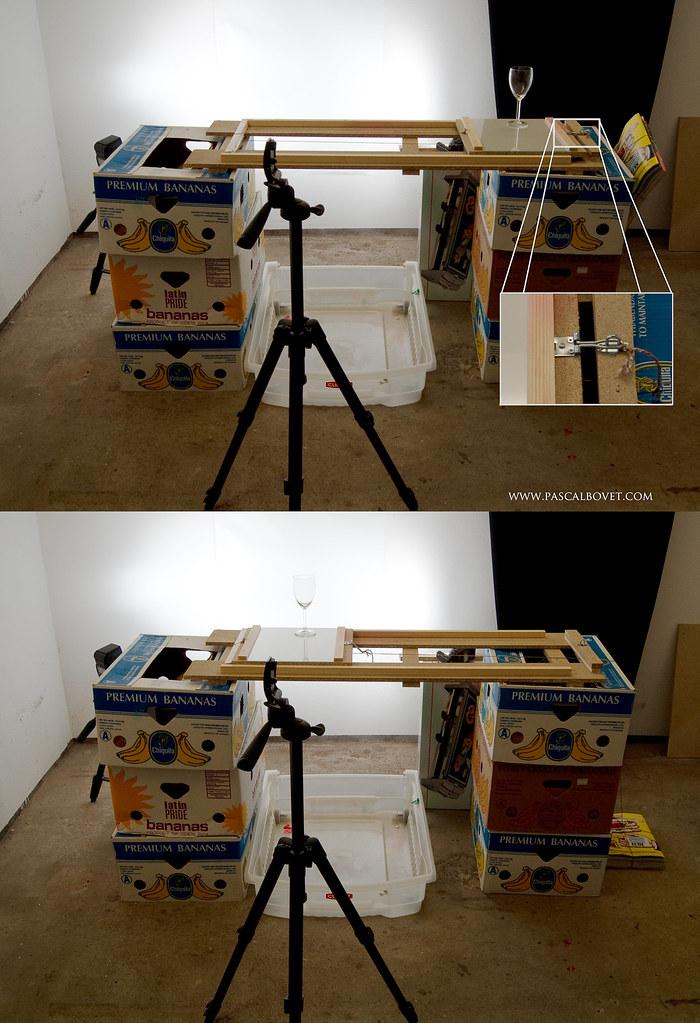
The photo has some notes, click to view on flickr
On the top side of the slider I mounted a white adhesive film, on top of that a glass from an old photo frame. The wine glass is glued onto this photo frame glass. On the bottom side of the slider are rollers, to get a smoother movement. The movement of the slider is generated by a pile of old magazines, which are connected to the slider with a cord. If the table is ‘unloaded’ the pile of magazines is on the floor, if I load the table, the pile is hanging around in the air and waiting to fall down. I used a simple locker to keep the ‘loaded’ position and as soon as this locker gets opened, the slider begins to move.
So basically thats all the magic about the sliding table.
So, what else is needed?
- Food coloring and water
- Sound trigger (hiviz.com)
- Arduino (Arduino – HomePage)
- 2 Flashes
- Tripod
- More white adhesive film
- Some paper towel
- Window cleaner
- A dark room where it can get messy
- Yongnuo RF602 Wireless Trigger (from ebay)
- and last but not least your cam
The white adhesive film is used to create a white background. You can use whatever you have, but keep in mind, that I may get wet and dirty. On of the advantages of the adhesive film is that one can easily clean and reuse it.
Setup
The setup is the same as with my „Bursting Balloon Shot“.
I have a hiviz sound trigger, which is attached to an arduino board. The arduino board is connected to the RF602 sender, which will trigger the flashes as the slider touches the stop scantling. The laptop is just needed as power supply for the arduino and in case I have to modify the code. The main reason for using the arduino is, that I can put a delay after the flash is triggered to ensure that the flash isn’t triggering a second time.. The second reason is that the delay is adjustable with an accuracy in the range of milliseconds..
Also this shoot am I shooting in a dark room on long exposure mode with a an aperture of about F10, during the long exposure I fire the flashes. (This will freeze the action).
As you may know, glass can create ugly reflection if the flashes are not placed correctly. Therefore I decided to point both flashes on the white background (one at 8 o’clock and one at 4 o’clock of the sliding table). After some minor adjustments I got a lighting which was suitable for this setup.
Shooting
I cleaned the glass, filled the wineglass with colored water and I was ready to go.
So first, I set the focus (manual), turn of the lights and check whether the picture is sharp or not. I let the preflash delay where it was from my last shot at 0 ms, somewhere you have to begin.
As everything was okay, it was time for some action. I ‘loaded’ the sliding table, turned of the lights, started the camera and released the locker.
The first shot I run with a delay of 0 ms and guess: The water isn’t moving this fast. After cleaning the table I did a second test shot with 150 ms, which looked much better, but still not that big splash. I increased the delay a second time to 250 ms and the third shot was what I wanted, see below:

From then it was the same procedure. Shooting, cleaning, shooting, cleaning…
I did some more shots with different colors..
Postproduction
Crop, adjust levels, saturation, some sharpening and minor cleaning.
Finally here the cam parameters:
Sony A550
Sony 18-55mm @ 35mm
ISO 200 – f11 – 6 sec
I hope I could give you an insight in my deliberations. If you like this, you can have a look at my other highspeed shoots.
I’m open to suggestions, constructive feedback, criticism (both, about the setup and this post, ) and would like to her your comments..
If anything is not clear or you have any question, or need some detail information about the trigger / arduino, feel free to ask.

Thank you for sharing this 🙂
hi, very nice trick,
please tell me how did you glued glass on frame??
Thanks for your comments..
@owais
I used superglue.. Maybe this isn’t the best solution.. One could also try special glass glue..
it was very interesting to read.
I want to quote your post in my blog. It can?
And you et an account on Twitter?
Hello,
Thank you for your comment..
Feel free to quote my post.. Please link back to my homepage…
Yeah, my twitter account is: http://www.twitter.com/pascalbovet/
Regards Pascal
Very nicely done. I’ve looked at those automatic triggers before, but realised that I would never have the imagination to come up with setups like you have. Thank goodness I can just keep an eye out for photos from people like you 🙂
This is amazing! really loved the idea. Thankyou soo much for sharing it! So kind of you!
Pingback: 1×1 der Highspeed Fotografie – Lektion 7 | pascalbovet.com
Pingback: Highspeed photography 101 – Lesson 7 | pascalbovet.com